[ samuki @ 18.04.2021. 10:06 ] @
| Znali neko kako se kalibrira ovaj instrument. Prikaze ER3 kada hocu da kalibriram temperaturu?  |
|
[ samuki @ 18.04.2021. 10:06 ] @
[ samuki @ 18.04.2021. 10:11 ] @
Za ulazak u kalibraciju treba pritisnuti tipku Hold i upaliti multimetar na Mega omhe, onda dva puta pritisnuti tipku Hold.
Onda se prebaci na temperaturu i sa tipkom Light stima temperatura. Pocetna je na 30. Ali nece da se nastima na 25 ? Prikaze ER 3! [ Living Light @ 18.04.2021. 13:02 ] @
Kalibraciju na takav nacin nikada nisam radio.
Kada sam nesto kalibrisao, uvek sam za to trebao da imam "to nesto" referentno i pouzdano pa onda podesavao ono sto kalibrisem. Referentni napon, struja, otpor pa i temperaturu, ali sve to dovoljno tacno, sve u zavisnosti sta se kalibrise. E sad, Ako je DMM ispravan, da te ne zeza mozda baterija koja je na izdisaju, DMM radi dok meri napon ali cim stisnes taster za osvetljenje napon napajanja (BAT) u tom kratkom vremenu toliko padne da procesor (ili sta vec ima u sebi) jednostavno se pogubi i na displeju ispise ER3 Bilo bi dobro znati, ili da se negde nadje lista gresaka da se vidi sta podrazumeva pod ER3? Imao sam slucaj sa baterijom od 9V kada je merim 8.98V ali kad je stavim u DMM i merim napom baterije dok je DMM u radu, napon ode ispod 7V, a instrument na displeju izbacuje kuke i kvake. [ samuki @ 18.04.2021. 13:27 ] @
Living nije do baterija nove su kao i instrument dvije Aaa. Ima indikaciju kad su slabe baterije ispod 2.4v.
Ovo je do programiranja sada su svi pametni multimetri sa mikroprocesorima i secret codovima za ulazak u podesavanje ! [Ovu poruku je menjao samuki dana 18.04.2021. u 15:48 GMT+1] [ Living Light @ 18.04.2021. 14:05 ] @
Ipak bi informacija o tome sta znaci ER 3
bila od znacaja. I opet te prozvodjac vezuje za sebe, kupis nesto a nemas pristupa nicemu, strasno. Mozda se javi neko ko ima isti DMM, pa je savladao kalibraciju. [ Living Light @ 19.04.2021. 22:02 ] @
samuki,
Da priupitam. -Gde si se ti setio/čitao da to treba tako? (toliko oprečnih, kontradiktornih INFO o tom DMM-u, da te Bog sacuva) Ako imas vremena, daj neki link o tome. Ja pročešljao net, i nadjoh samo uputsvo, +video. A ni traga o grešci ER 3. [ Living Light @ 21.04.2021. 07:55 ] @
Naisao sam na jedan lep opis za tu seriju DMMa:
"UT131C Palm Size Multimeter The new generation UT131 series redefines the performance standards for entry-level digital multimeters. Our innovative industrial design ensures that these products can withstand 2 meters drop. The new LCD display layout provides a better user experience. This series ensures that users can work safely in CAT II 250V environment. Special features are: 2mF capacitance test (UT131A); battery test (UT131B); temperature measurement function (UT131C); non-contact voltage (NCV) test (UT131D)." [ samuki @ 21.04.2021. 09:41 ] @
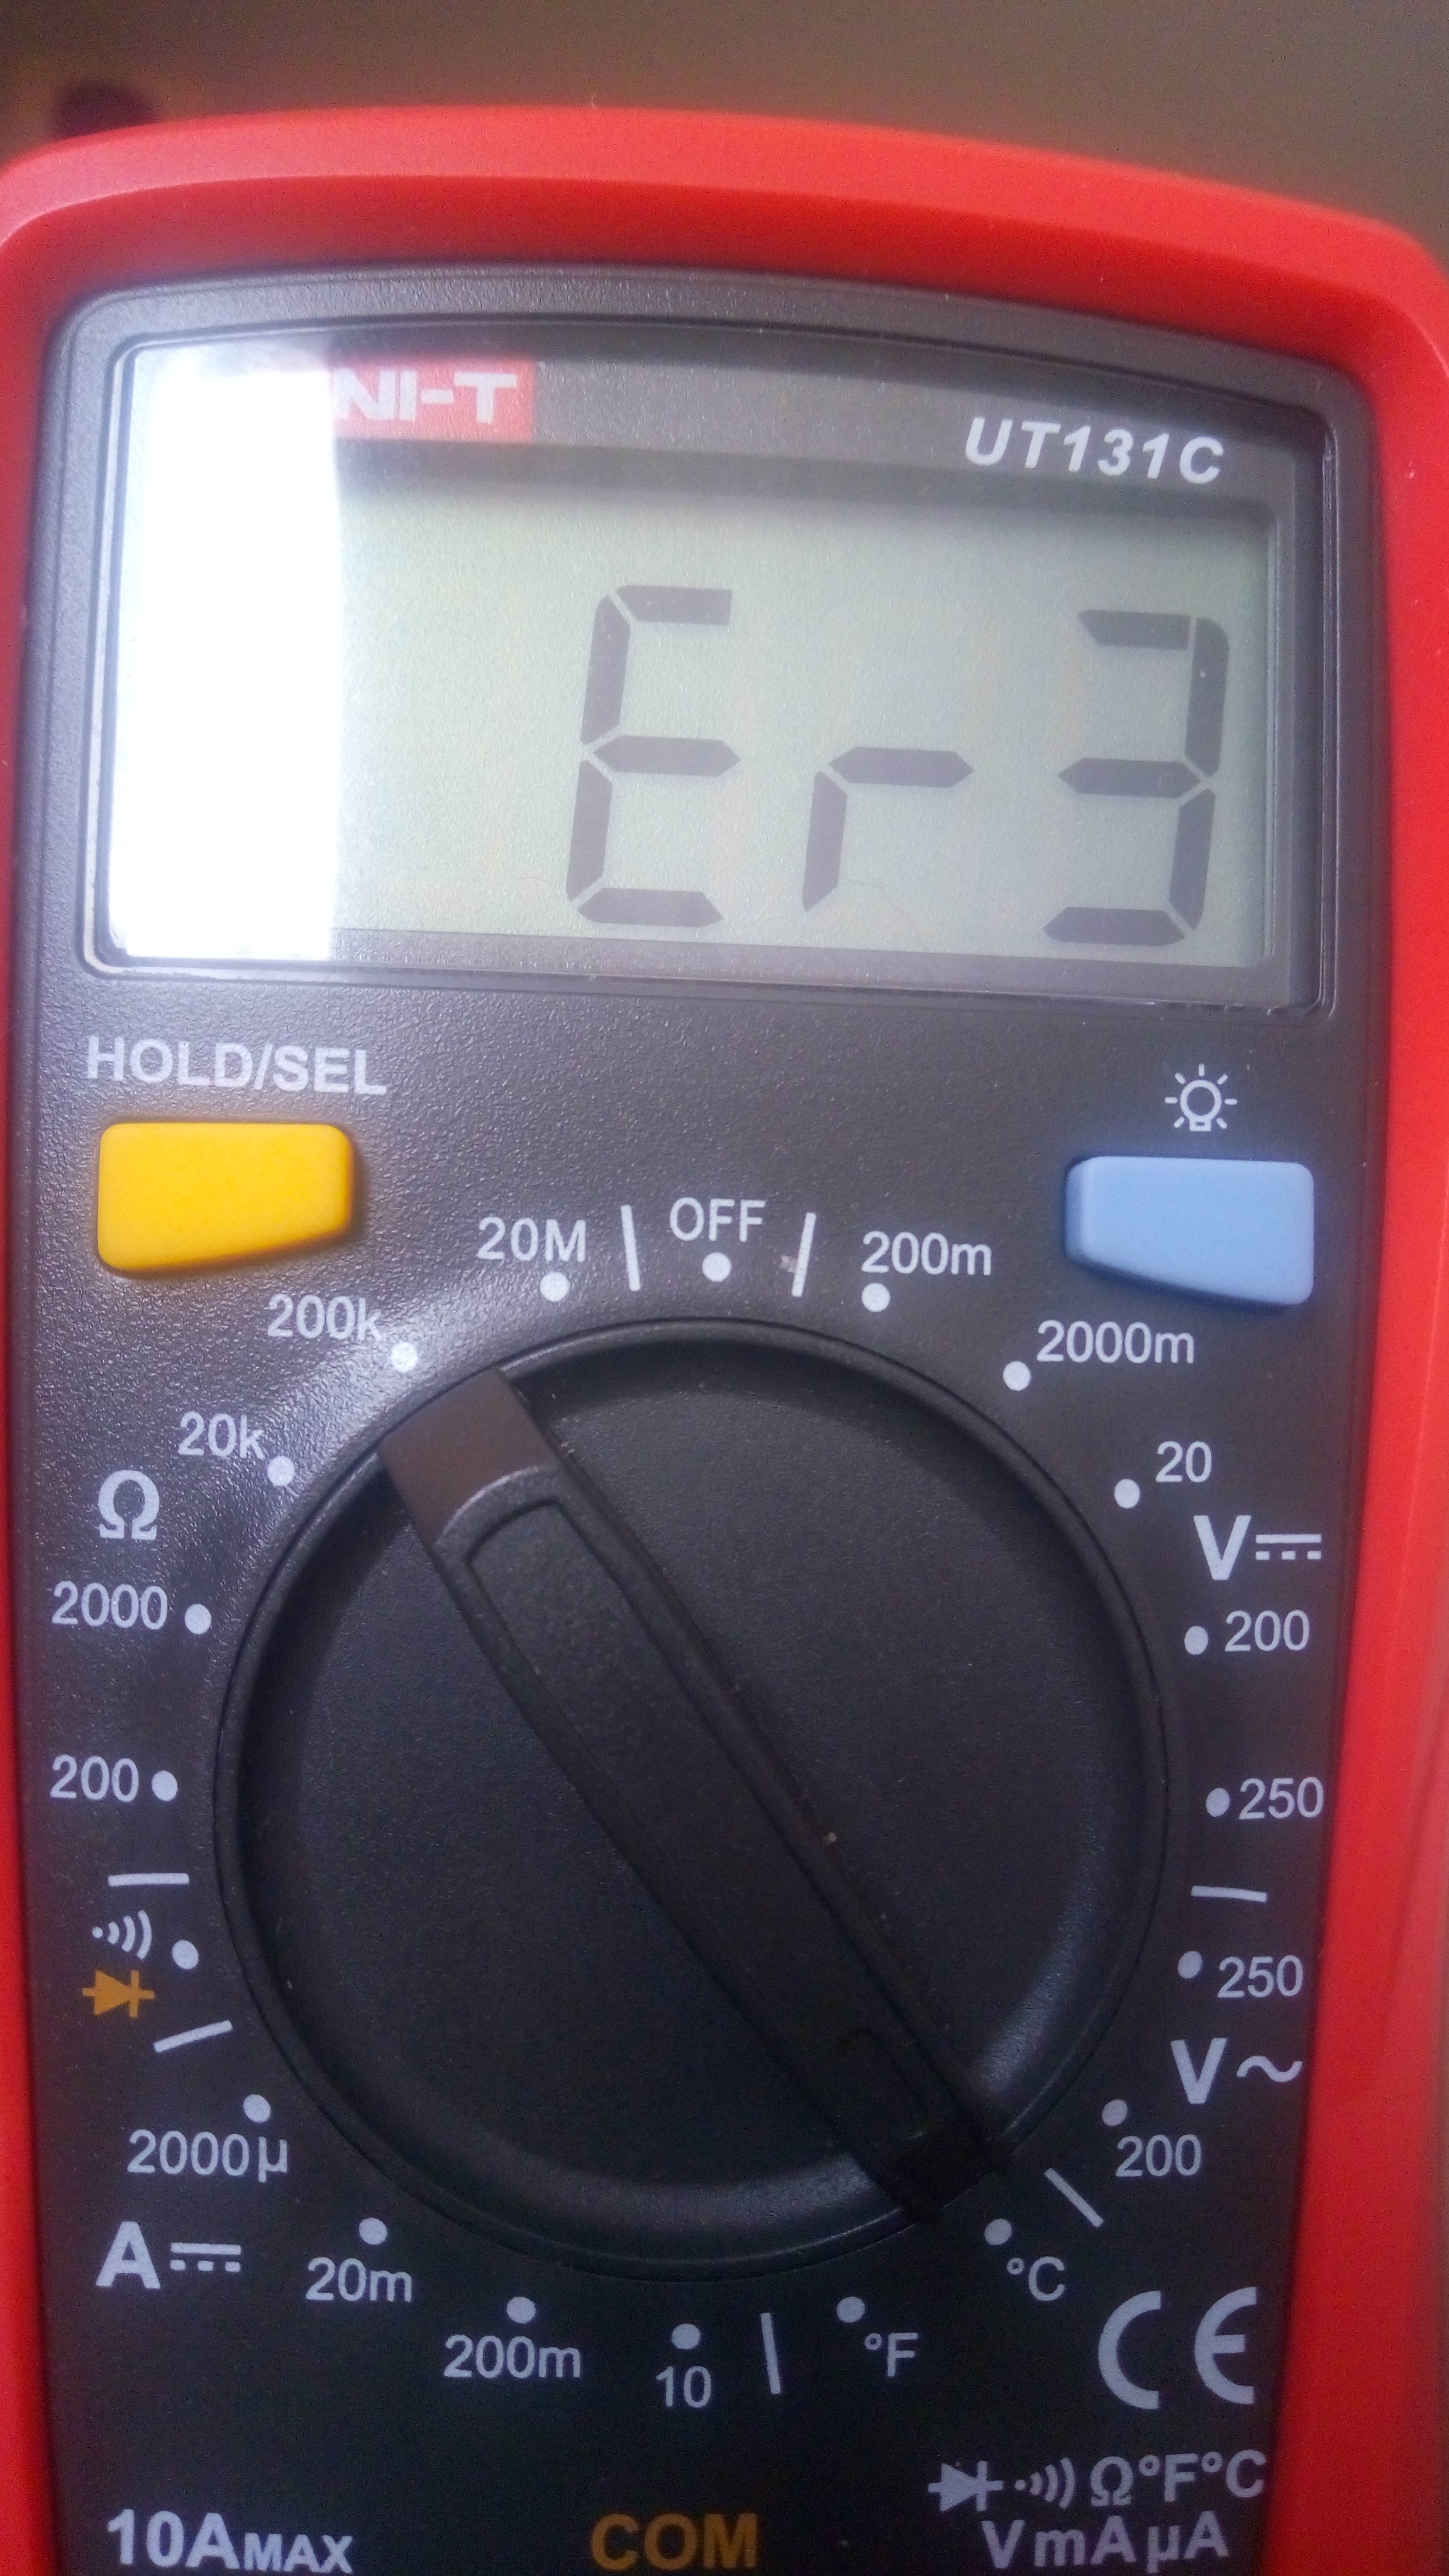
Er 3 se javlja kad hocu da kalibriram temperaturu .
[ samuki @ 21.04.2021. 09:44 ] @
Slika evo.
 [ dr0id @ 21.04.2021. 22:49 ] @
Ako je nesto slicno ovom https://www.eevblog.com/forum/...ration-in-my-uni-t-ut139c-dmm/
Citat: 12.5 Ambient Temperature correction (input actual ambient temperature) {DMM cold junction temp} Function switch in Temperature. LCD display default value of 25C or the last adjustment of the ambient temperature (non-current temperature) according to the environment at the time of calibration. Temperature, press +/- to adjust to the ambient temperature (adjustable range 0 ~ 50C). Note: If you do not adjust the LCD and the default display temperature is the current ambient temperature, at this time need to press at least +/- The whole time, if the previous adjustment does not need to adjust again, press SELECT skip. trebace i jumper https://www.eevblog.com/forum/...ocedure/msg1267492/#msg1267492 Ili preko EEPROMa https://www.youtube.com/watch?v=Vj6b-clYTis [ Living Light @ 22.04.2021. 02:23 ] @
Lep text, nema sta.
Taj DMM je jos napredniji. Mislim da se sve to odnosi na model UT-139C. Postavljac pitanja ima model UT-131C. 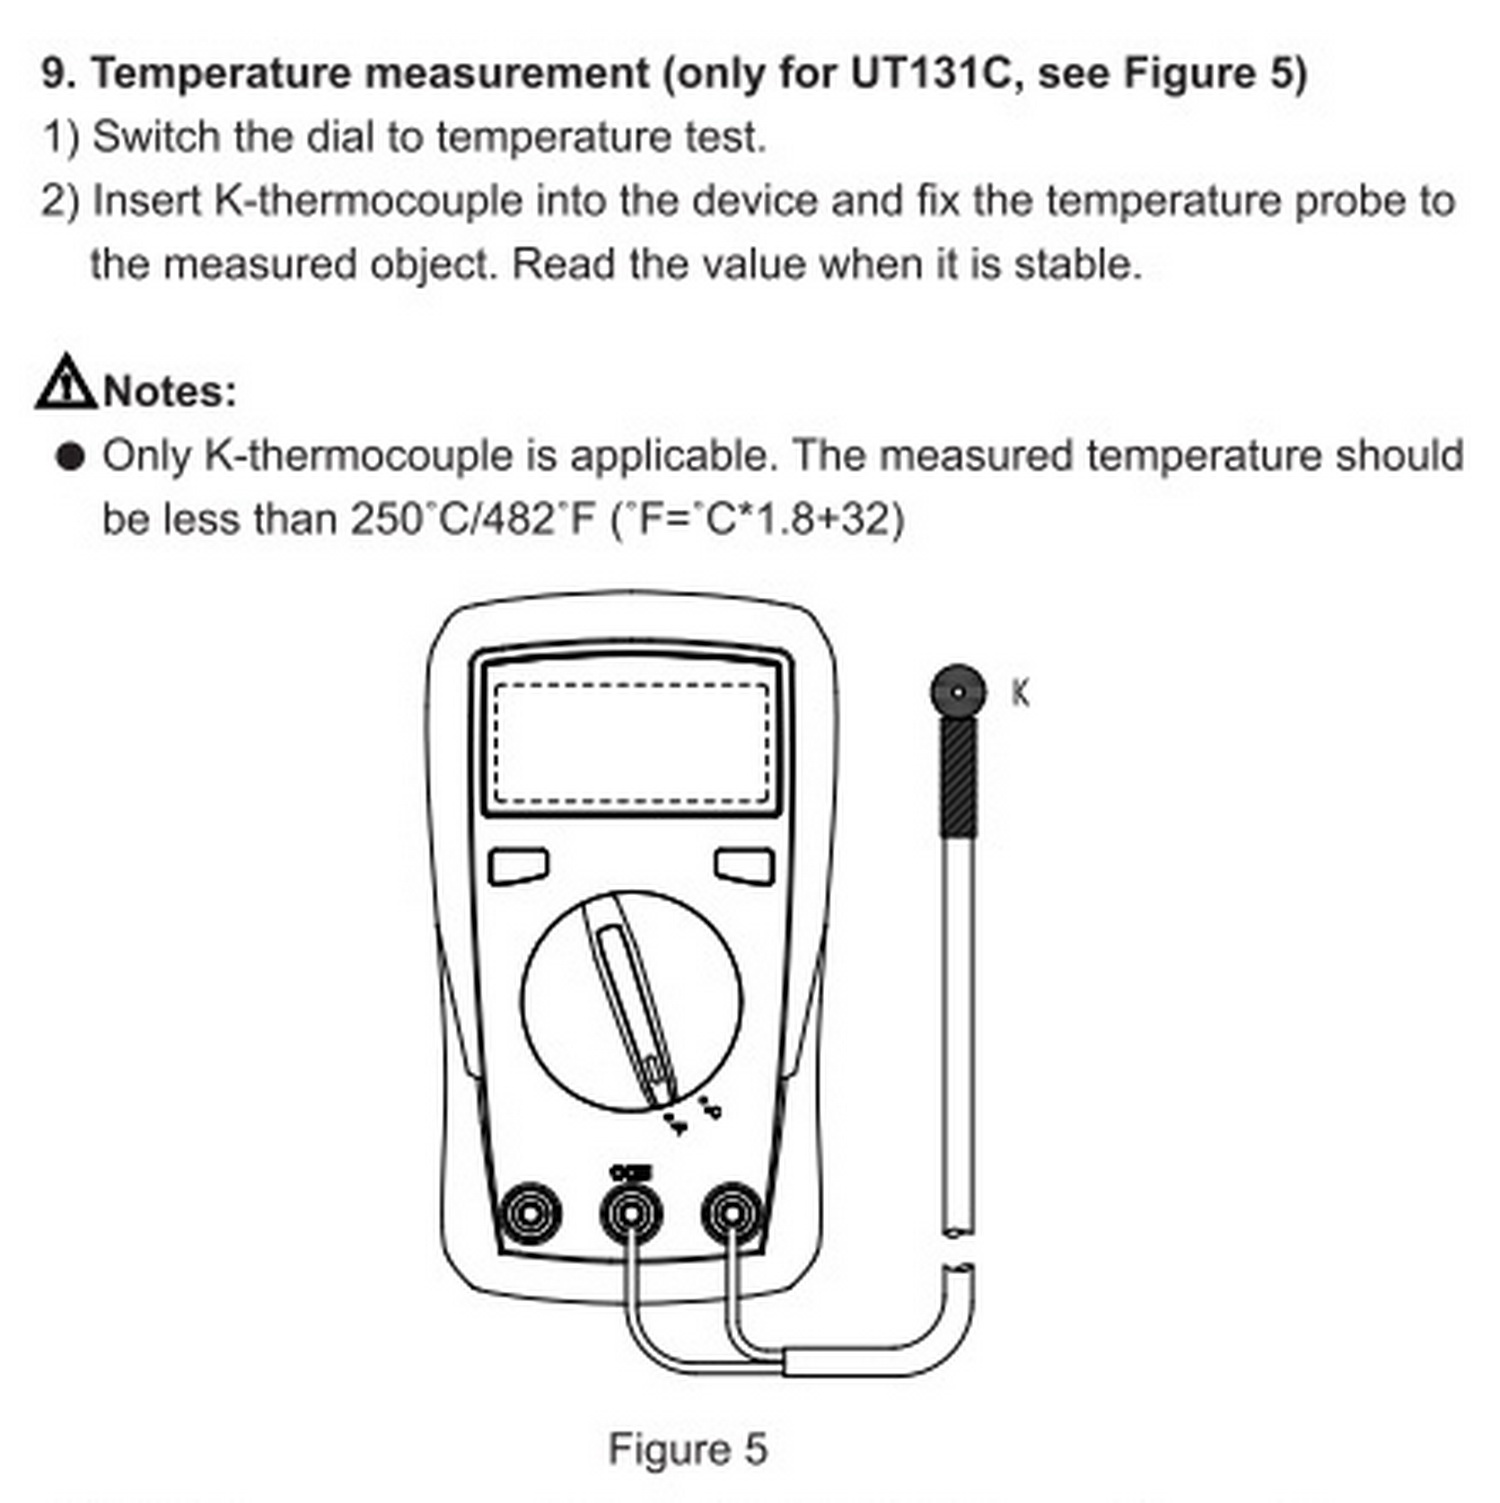 [ samuki @ 22.04.2021. 09:31 ] @
Slicno je samo taj jumper nije.
 [ dr0id @ 22.04.2021. 14:33 ] @
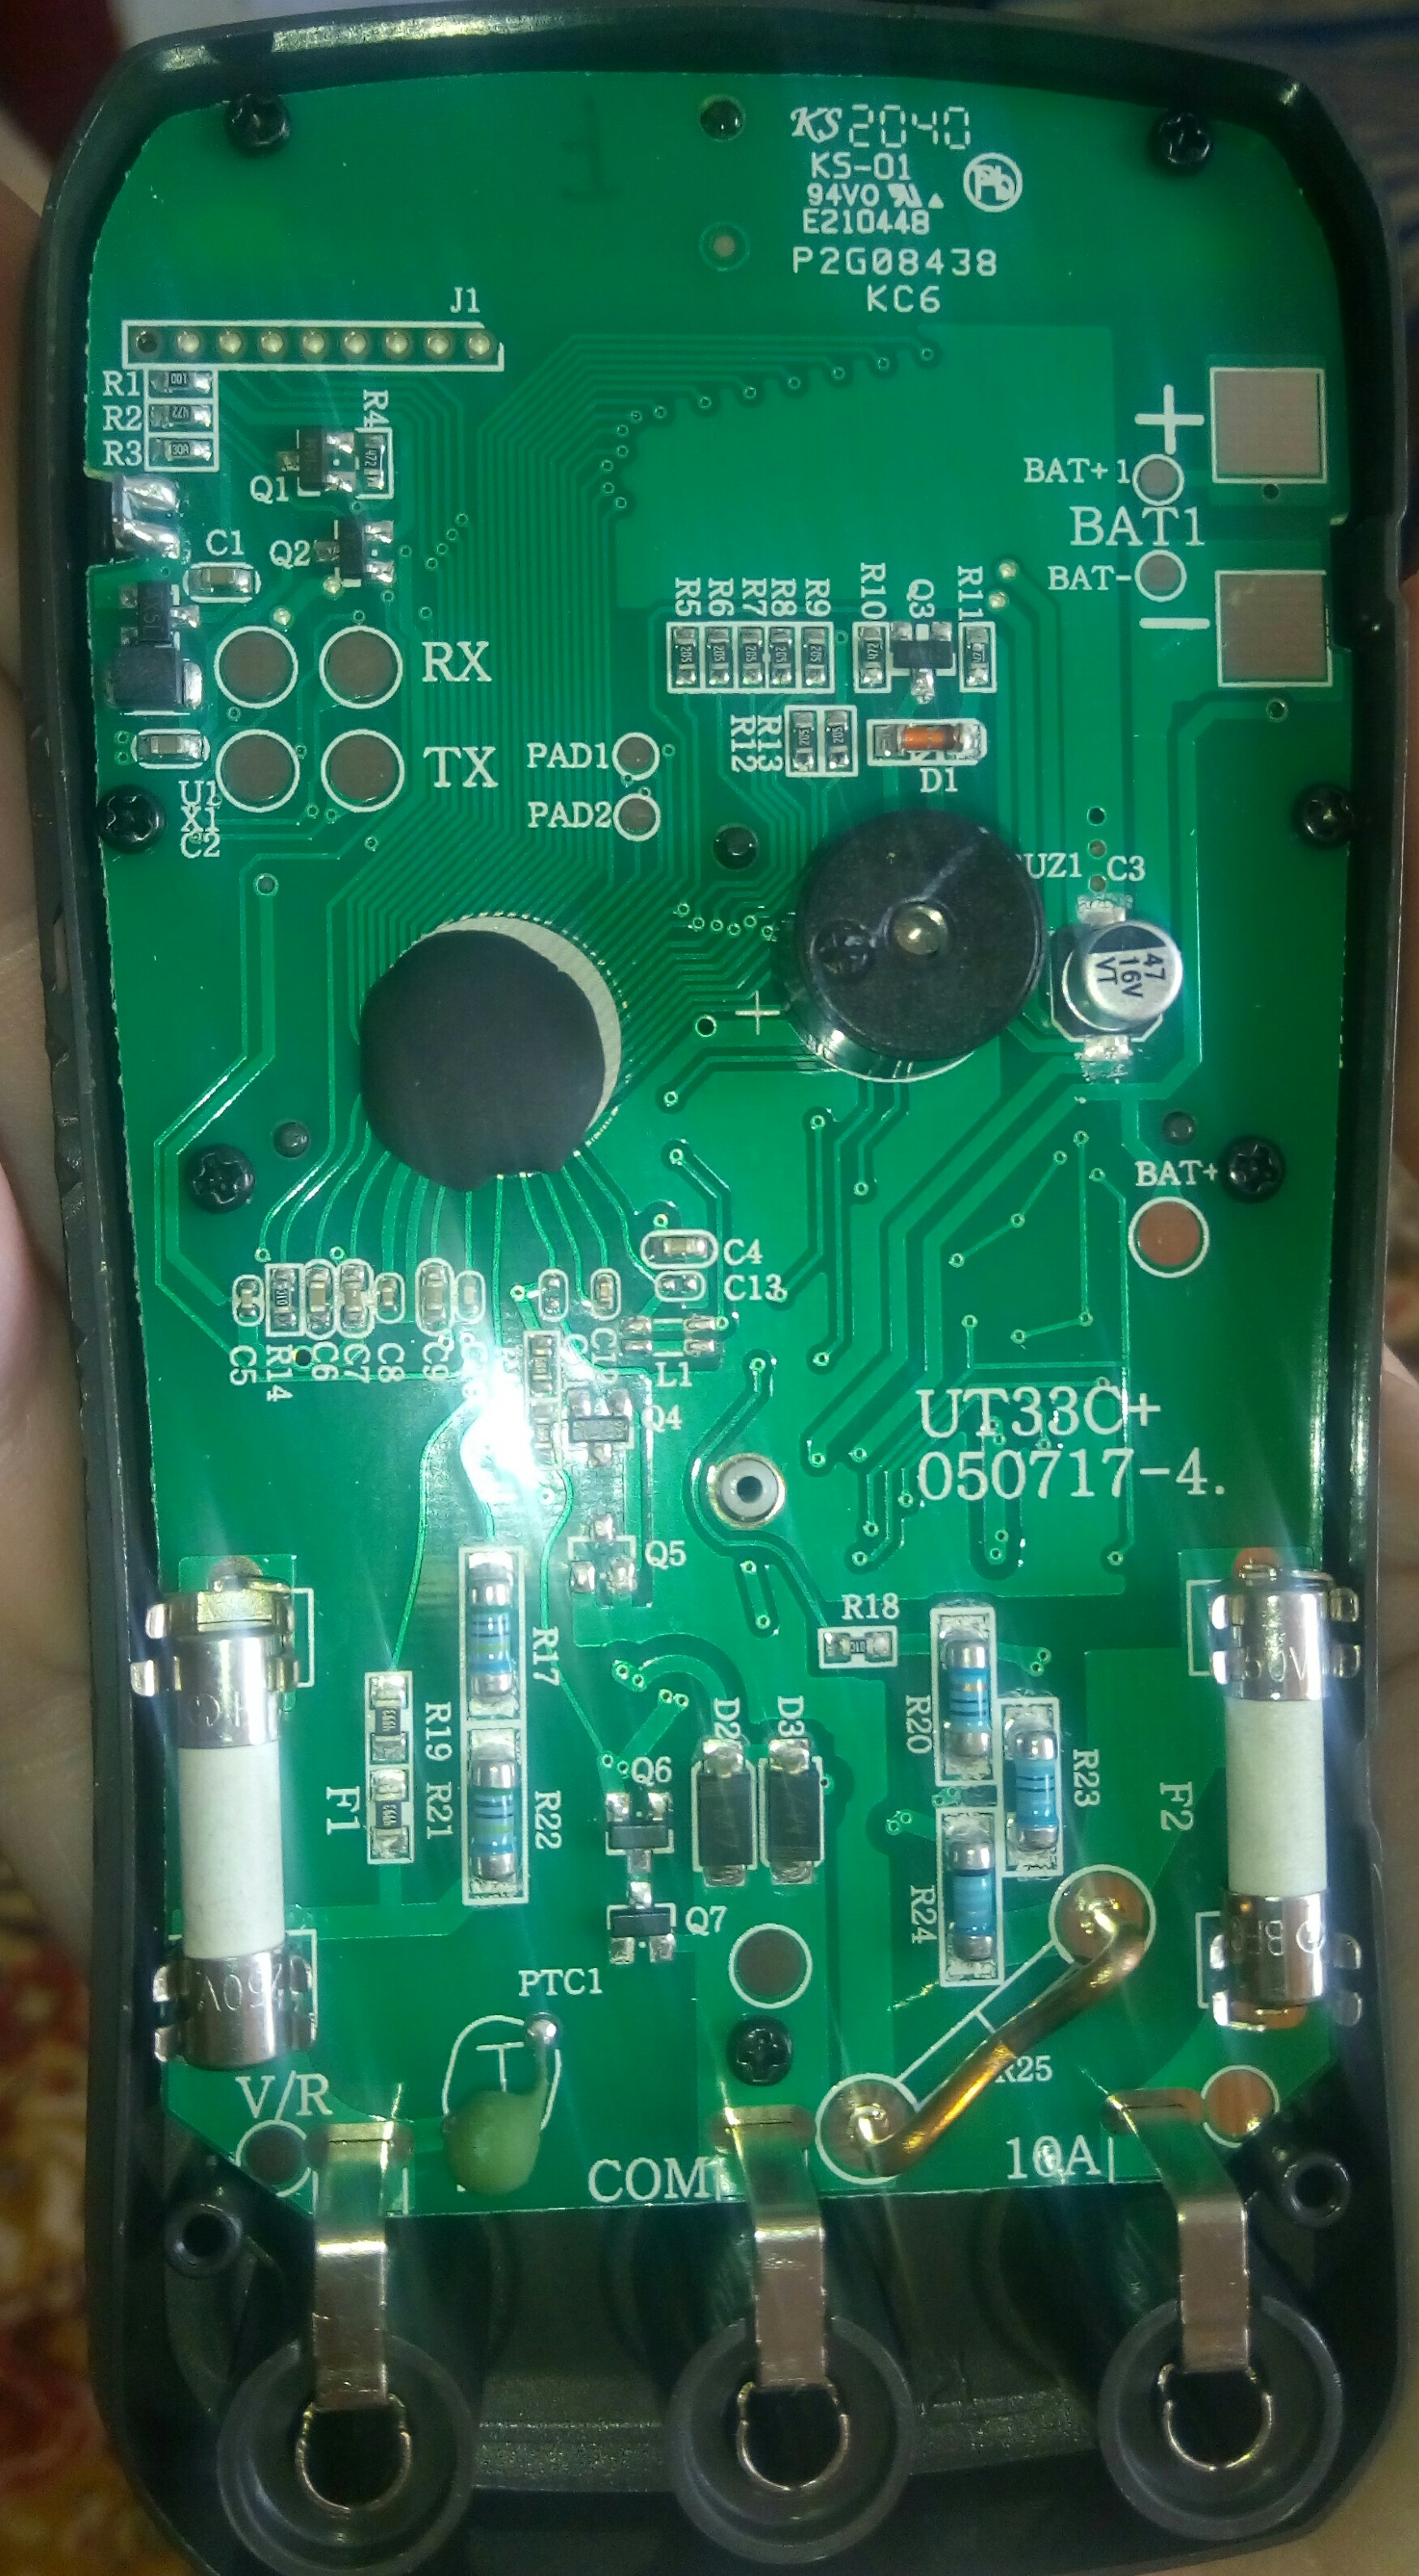
A nije taj J1?
[ Living Light @ 22.04.2021. 14:38 ] @
A gde je taj J1?
[ dr0id @ 22.04.2021. 14:55 ] @
Gore levo
[ Living Light @ 22.04.2021. 15:12 ] @
s' 8 pin?
Jel to neki smart djamper? ...za to, cuo nisam. Starno, sta je ovaj J1? [ samuki @ 22.04.2021. 16:37 ] @
Mislim da je za povezivanje na programator.
[ Living Light @ 22.04.2021. 16:50 ] @
samuki,
Nisi odgovori na pitanje. Kako si Ti nasao nacin, da na tvom DMM-u udjes u kalibraciju Temperature? [ samuki @ 22.04.2021. 17:47 ] @
Napisao sam vec.
Power off. Drzati tipku Hold i upaliti instrument okretanjem preklopnika na 20Moh. Zatim dva puta pritisnuti tipku Hold. Onda preklopnikom prebaciti na C. Drzati Light tipku ide se unazad sa kalibracijom ili pritiskati tipku Light ici unapred . pritisnuti tipku Hold . Onda izbaci Er3. [ samuki @ 22.04.2021. 17:49 ] @
Samo sto sam jednom uspio i povecao sa 25 na 30C. I sad vise nece. Ispisuje Er3.
[ dr0id @ 22.04.2021. 18:43 ] @
Citat: According to the very limited information I could find in the original Chinese manual, the display of an “Err” (followed by a number 0~4) indicates something is wrong with the measurement circuitry. However the manual did not explain much but did suggest that it could be a fault in one of the voltage dividers. Unfortunately, that’s all the information I could find. http://www.kerrywong.com/2016/...ic-em860t-true-rms-multimeter/ Citat: Err3 The present measurement range and the range of the stored reading is not the samewhen recalling the reading https://www.manualslib.com/manual/538620/Uni-T-Ut805.html?page=55 www.kerrywong.com/blog/wp-cont...s/2016/04/DTM0660DataSheet.pdf Citat: 12.5 Ambient temperature correction (input actual ambient temperature) The measurement function of the meter to be calibrated is placed in the temperature file (or resistance file (J1A, J1B short circuit)). The LCD displays the default value of 25°C or the ambient temperature at the time of the last adjustment (not the current temperature). According to the environment at the time of calibration For temperature, press +/ to adjust the display to ambient temperature (adjustable range 0~50℃). Note•If it has not been adjusted and the temperature displayed on the LCD by default is the current ambient temperature, at least press +/one to adjust It is exactly once, if there has been adjustment before, there is no need to adjust again, press SELECT to skip. https://drive.google.com/file/d/0B6fbSrbAyU1lUlhBQXY3bS1RLU0/view https://bit.ly/3avPyeT Citat: 1-Simply hold pressed the HOLD+SELECT buttons while you turn on the meter to the ohms/continuity/diode option (second position). Then release the buttons. I am not sure if this wheel position is really mandatory, but it is described in some places as the correct method. The meter will show "CAL" and will do some auto tests. You can abort this tests pressing select 2 times. If you let it run over, it will end the auto-tests after some minutes. (note: after change the count config to reach 6200 counts the aut-test take much more time, then I gave up waiting). 2-Now put in the function/scale you want to calibrate (rotate the wheel and press select until you reach there), can be DCV for example. I tested only for DCV (all ranges) and DCA (all ranges) but most probably it will work for others, like ohms and capacitance. The ACV seams to share the calibration of DCV. I did not tested ACA. 3- Now comes the main part (apparently undocumented). While you are in whatever function you chose before, you can calibrate the zero point by pressing the ZERO button (once per function/scale calibration procedure) and the gain by pressing the HOLD button (short press to decrease the reading and long press to increase the reading). However, to do so you need to feed the leads with a known integer value, once each press in HOLD will jump the reading to next integer above(long press) or below(short press). So, for example if you feed 12.00Vdc but you read 11.82Vdc, than long press HOLD while you are sure the correct voltage is 12.00Vdc and the meter will adjust the reading to 12.00Vdc (first integer above 11.8V). -Therefore, each long press will jump the reading to next integer above, while the short press will make jump to the next integer below. -Depending the scale you are the jump may not be an integer, however you will figure it out while doing the process. -Pay attention to the scale you are. As DCV is autoscale you need to adjust when you are at 0.000, when you are 00.00 and when you are 000.0. You need to change the scale by changing your voltage source. The point in each range to calibrate is a personal choice. I noticed that the linearity is not so good, than I prefered to calibrate at 17.00Vdc the 60Vdc range once I will be reading values mainly from my battery bank between 12 and 24Vdc. 4-After the procedure for all functions and scales you are interested to calibrate just turn off the meter. In the next turn on the new calibration is used normally. Citat: To enter the normal calibration mode, you need to close S1 (according to the J8 scheme) and turn on the multimeter. Tests of something internal will begin, after the tests are completed, the calibration mode should turn on directly. After passing the tests, I get the message Err0. Something is not right, but what exactly the hell you understand. If you immediately switch the selector to either Ω or Hz, then the tests will pass without errors. http://kazus.ru/forums/showthread.php?t=112135 A ako nije to onda je ovo https://www.eevblog.com/forum/...er-info/msg2687913/#msg2687913 [Ovu poruku je menjao dr0id dana 22.04.2021. u 20:20 GMT+1] [ samuki @ 22.04.2021. 22:33 ] @
Slicno je ali nema jempera !
Copyright (C) 2001-2025 by www.elitesecurity.org. All rights reserved.
|